Larry Brouwer

... just my personal technology sandbox

  • About
  • Blog
  • Archives
  • Contact

Connect

  • Email
  • Facebook
  • LinkedIn

Powered by Genesis

Weaver’s Bamboo “Bambusa textilis” clumping bamboo for sale

April 11, 2016 By Larry Brouwer Leave a Comment

bambusa textilis in 15 gallon containersHello everyone. I usually keep a pretty busy schedule with my day job as an IT consultant, however, there’s just enough Iowa farm boy left in me to maintain a hobby in growing a little something to get my mind off the computer for a while. That something is Weaver’s clumping bamboo (or scientifically named: Bambusa textilis) in my backyard on the northwest side of Houston!

weavers bambooIt all started when I joined the Harris County Master Gardner’s Association back in the early 2000’s. While volunteering there, I was inspired by a giant bamboo plant growing at the back of the gardens. After talking with the County Extension Agent – Horticulture (and then to be future wife, Dr. Carol Cammack), she challenged me by stating how difficult it was to propagate! So, I took a couple root cuttings from the giant clumping bamboo plant, and began experimenting with producing bamboo in my suburban Houston backyard.

weavers clumping bamboo in 5 gallon containersIt took several years of trial and error to perfect my method of propagating Weaver’s bamboo, but nevertheless, I’ve done a pretty good job of it. So much so, that my lovely wife, Carol, tells me it’s time to begin selling some of my surplus supply of the bamboo plants (or hint: she wants her backyard back!). That being the case, I’m now actively marketing the bamboo and have them available in various sized containers from 5 gallon all the way up to 50 gallon, mostly 10 to 15 gallon containers. I’m offering them up for sale at $10/gal., and would be willing to deliver them (around the Houston metro area) for a small fee.

clumping weaver's bamboo in 15 gallon containersWeaver’s bamboo is clumping by nature, and is quite easily contained, so you won’t have to worry about it spreading. Also, it grows very thick and quite tall. It really is a spectacular variety of clumping bamboo, and can get quite pricey if you purchase them directly from a retail nursery. So, if you’re interested in buying a plant or 10 or even 100 of them, please message me, and I’d be happy to work something out with you.
Filed Under: Notable Tagged With: clumping bamboo

configuring NTP Service on FreeNas, XenServer, and virtualized Windows Server 2012 R2 Domain Controller

April 8, 2016 By Larry Brouwer Leave a Comment

Resources used to complete the configuration:

FreeNAS

http://joepaetzel.com/2014/03/03/freenas-naughty-ntp/


XenServer

http://support.citrix.com/article/CTX121278
http://support.citrix.com/article/CTX116307


NTP

http://www.pool.ntp.org/zone/us
http://support.ntp.org/bin/view/Support/AccessRestrictions#Section_6.5.1.1


Windows Server 2012 R2

http://nefaria.com/2013/03/configure-windows-server-20082012-to-sync-with-internet-time-servers/


My network consists of 2 FreeNAS servers, and 3 XenServer virtualization servers (which run most of the Microsoft Server 2012 R2 servers, and 2 CentOS 7 machines), and several Windows 7, 8 and 10 clients.

After some consternation, I determined the best course of action was to set up one of the FreeNAS servers to be the primary NTP Server for the network, with the second FreeNAS Server acting as the secondary NTP Server.

Here’s the configuration changes I made to the primary FreeNAS server:

edit: /conf/base/etc/ix.rc.d/ix-ntpd

add the following line towards the end just above the “EOF”:

restrict 10.1.10.0 mask 255.255.255.0 nomodify notrap nopeer

Using the GUI, log in and navigate to System | General, then click on the “NTP Servers” button at the bottom right.

enter the following NTP servers:

0.us.pool.ntp.org
1.us.pool.ntp.org
2.us.pool.ntp.org
3.us.pool.ntp.org

reboot the box

On the Secondary FreeNAS Server, make the following changes:

edit: /conf/base/etc/ix.rc.d/ix-ntpd

add the following line towards the end just above the “EOF”:

restrict 10.1.10.0 mask 255.255.255.0 nomodify notrap nopeer

Using the GUI, log in and navigate to System | General, then click on the “NTP Servers” button at the bottom right.

enter the following NTP servers:

0.us.pool.ntp.org
1.us.pool.ntp.org
2.us.pool.ntp.org
3.us.pool.ntp.org
10.1.10.x –> IP Address of the Primary FreeNAS Server, make this a “Preferred” NTP Server

reboot the box

On each of the XenServer Servers, using XenCenter, log into the console for each and make the following changes:

Using “xsconsole”,

navigate to “Network and Management Interface”
navigate to “Network Time (NTP)”
log in as root
Remove All NTP Servers
Add the Primary FreeNAS Server’s IP Address
Add the Secondary FreeNAS Server’s IP Address
reboot the box

To verify that NTP is working correctly, log into the XenServer console and enter the following:

ntpq –p 10.1.10.x –> the Primary FreeNAS Server, you should get something like this returned:

     remote           refid      st t when poll reach   delay   offset  jitter
==============================================================================
+y.ns.gin.ntt.ne 249.224.99.213   2 u   45   64    7   45.388   -2.965   1.896
+104.156.99.226  204.123.2.72     2 u   41   64    7   66.195    5.041   1.599
*clock.xmission. .GPS.            1 u   43   64    7   39.903   -1.483   2.415
time.tritn.com  198.60.22.240    2 u   40   64    7   51.294    1.535   1.984

ntpq –p 10.1.10.x –> the Secondary FreeNAS Server, you should get something like this returned:

     remote           refid      st t when poll reach   delay   offset  jitter
==============================================================================
+cheezum.mattnor 129.7.1.66       2 u   30  128  377   13.744   -7.718   2.658
+mdnworldwide.co 127.67.113.92    2 u   31  128  377   22.938   -8.589   0.869
-repos.lax-noc.c 206.117.25.20    2 u   41  128  377   50.227   -2.232   2.751
*freeNas.loc.com 198.60.22.240    2 u   73  128  377    0.188   -5.571   1.500
-snotra.fanube.c 132.163.4.102    2 u   66  128  377   54.298    1.640   4.002


On the Windows Server 2012 R2 primary domain controller, open a command prompt and enter the following:


w32tm /monitor
w32tm /query /status
net stop w32time
w32tm /config /syncfromflags:manual /manualpeerlist:”10.1.10.x, 10.1.10.x”
w32tm /config /reliable:yes
net start w32time
w32tm /query /configuration

Filed Under: Daily Log

CentOS 7 Warning: Your Magento folder does not have sufficient write permissions.

January 27, 2016 By Larry Brouwer Leave a Comment

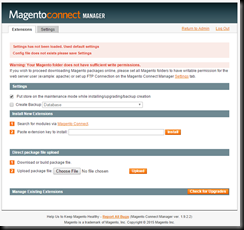
I recently set up a new Linux (CentOS 7) box as a Magento development environment for one of our clients. I was primarily interested in using Magento Connect to do an upgrade from Magento 1.9.2.2 to Magento 1.9.2.3. When I tried to use the Magento Connect Manager, however, I immediately started running into issues. I kept getting the warning message, Warning: Your Magento folder does not have sufficient write permissions and wasn’t able to continue.

magento-connect-manager

After Googling numerous times, and verifying my file permissions, and apache and php configurations, I still wasn’t able to solve the problem. Everything seemed to be configured correctly!

So, I created a simple php script to help me figure out what was going on:

<?php
echo `whoami`;
file_put_contents(‘/var/www/html/magento/var/log/test.txt’,’hello’,FILE_APPEND);
?>

The result was that the php process was indeed running as apache, and that I wasn’t able to write to the test.txt file. I was able to see the errors being generated in the php error log as:

[Wed Jan 27 11:50:09.557315 2016] [:error] [pid 15256] [client 192.168.1.112:57119] PHP Warning:  file_put_contents(/var/www/html/magento/var/log/test.txt): failed to open stream: Permission denied in /var/www/html/magento/testing.php on line 4, referer: http://centos.trl.local/magento/testing.php

Armed with this information, I started searching Google again, and came up with this post, which lead me to this post. After following the instructions found here, I was able to continue with my upgrade.

Commands used to resolve my file permission issue:

#getenforce
Enforcing
#cd /etc/selinux
#cp config config.orig
#vi config

# This file controls the state of SELinux on the system.
# SELINUX= can take one of these three values:
#     enforcing – SELinux security policy is enforced.
#     permissive – SELinux prints warnings instead of enforcing.
#     disabled – No SELinux policy is loaded.
#SELINUX=enforcing
SELINUX=disabled
# SELINUXTYPE= can take one of three two values:
#     targeted – Targeted processes are protected,
#     minimum – Modification of targeted policy. Only selected processes are protected.
#     mls – Multi Level Security protection.
SELINUXTYPE=targeted

#setenforce 0

(no need to reboot)

I hope this helps someone else!

Filed Under: Notable Tagged With: CentOS, Linux, Magento

AOE Scheduler 1.3.0 cron issue with Magento 1.9.2.2

November 23, 2015 By Larry Brouwer Leave a Comment

I recently upgraded a client’s Magento environment from 1.9.2.1 to 1.9.2.2 and I ran into some issues with the cron process. After reading a few posts with other people having similar issues, here, here, here, I decided to implement AOE Scheduler  (also available on GitHub, here) as this plugin gives me more visibility to what jobs are being processed, and additionally more flexibility, and control of the cron process. I was also hoping that my cron issues would be solved with this plugin! After installation, I followed the instructions for adding the AOE jobs to cron, but I still couldn’t get anything to work. After some quick debugging, I discovered that the jobs would run from the command line, but not from cron. The jobs I created are as per instructions below:


image


The error messages being generated from cron immediately lead me to the cause and its location. The problem was on line 3 of \shell\scheduler.php:

require_once dirname($_SERVER[‘SCRIPT_NAME’]) . DIRECTORY_SEPARATOR . ‘abstract.php’;

The fix that worked for me was:

require_once(dirname(__FILE__). DIRECTORY_SEPARATOR . “abstract.php”);

I hope this might help someone else!

Filed Under: Notable Tagged With: Magento

Google Mail gmail rejecting email from hosted exchange server 2010

October 13, 2015 By Larry Brouwer Leave a Comment

We recently starting getting this bounce-back message whenever sending to gmail email accounts:

mx.google.com rejected your message to the following e-mail addresses:

mx.google.com gave this error:
[2601:2c3:8201:8400:24c3:2c5:dc0e:ed3e] Our system has detected that this message does not meet IPv6 sending guidelines regarding PTR records and authentication. Please review https://support.google.com/mail/?p=ipv6_authentication_error for more information. r5si1844371obf.50 – gsmtp

Your message wasn’t delivered due to a permission or security issue. It may have been rejected by a moderator, the address may only accept e-mail from certain senders, or another restriction may be preventing delivery.

After some Googling, I found several posts that indicated I needed to disable IPv6 from our exchange box making a registry change. So, I proceeded to do this. However, we’re using Windows SBS2011 for our server, and this really upset the server to the point that it took 30 minutes to boot. So after getting the server put back together, I looked for an alternative solution. We have Comcast business class internet with a block of static IPs. So I contacted them and asked their support about whether we also have static IPv6 addresses. They told me that static IPv6 addresses weren’t currently available. So, I kept digging some more, and looked at our router configuration. Since I’m not really a network guy, I’m not very familiar with IPv6. However, I did see on the gmail delivery failure notification that there was an IPv6 address shown that it was complaining about:

mx.google.com #550-5.7.1 [2601:2c3:8201:8400:24c3:2c5:dc0e:ed3e] Our system has detected that 550-5.7.1 this message does not meet IPv6 sending guidelines regarding PTR 550-5.7.1 records and authentication. Please review 550-5.7.1 https://support.google.com/mail/?p=ipv6_authentication_error for more 550 5.7.1 information. r5si1844371obf.50 – gsmtp ##

So, I then logged on to our Windows Small Business Server 2011 box, and googled for “what’s my IPv6 address comcast”, and these links came back:

http://test-ipv6.comcast.net/

http://whatismyv6.com/

My suspicions were confirmed, as the IPv6 Address that came back was the same one in the gmail header! So, I then followed the google instructions in the support link they provided and added a new PTR dns record by logging in to our Domain Registrar (GoDaddy) and added an AAAA (IPv6 Host).

GoDaddyAAAArecord

Sure enough, it fixed the problem! So, the solution turned out to be super simple for me at least! I hope this post helps someone else out.


Filed Under: Notable

Configuring Mailprotector CloudFilter with Windows SBS2011 Exchange 2010 “SkipMXConfig”

October 6, 2014 By Larry Brouwer Leave a Comment

Over the past several months spam has been getting out of control, so I decided to try out Mailprotector (a cloud-based email filtration solution). The specific product that I’m evaluating is their CloudFilter Total Email Security product. Configuring it was relatively easy, I just followed the instructions listed here.

I did run into a couple bumps along the way that I wanted to share with you. My first hurdle was adding users to the domain. Mailprotector has the capability to do an LDAP sync with Active Directory. However, to do this requires knowing the exact connection strings. Mailprotector does have a tutorial on the subject found here. I followed the instructions, and made a few stabs at a correct connection string. However, after several failed attempts, I searched the web, and chatted with support. Support was friendly enough, however, they didn’t have much knowledge of the subject. So I continued to work this out on my own. Searching uncovered the LDAP dsquery command. I logged onto the SBS server, and opened an Administrative command prompt. At the prompt, I issued the following command:

dsquery user ou=MyBusiness,dc=trl,dc=local

At this point, I have a list of all the users defined in the Active Directory. The user that I’m mainly interested in is the Network Manager account:

“CN=Network Manager,OU=SBSUsers,OU=Users,OU=MyBusiness,DC=trl,DC=local”

This is the User Distinguished Name that I need to use for authentication within Mailprotector. To test out the connection string, I opened a console window on my Mac and issued the following command:

ldapsearch –h my.ip.add.ress:389 –x –D “CN=Network Manager,OU=SBSUsers,OU=Users,OU=MyBusiness,DC=trl,DC=local” –b “DC=trl,DC=local” –W

This yielded a list of users defined in Active Directory, which is just what I wanted to see.

With this in hand, I was able to set up the LDAP sync with Active Directory into my SBS2011 Exchange 2010 Server. One thing to keep in mind is to be sure to keep the “double quotes” around the Distinguished Name string. My first attempt didn’t have the double quotes, and it didn’t work. The second parameter needed is the search base. Here I just used the default format as shown in the tutorial:

DC=trl,DC=local

Here’s screen shot of my configurations:

image

After adding users to the domain, the next step is to configure the domain by changing MX records to point to Mailprotectors CloudFilter server. This usually has to be done with your domain registrar. In my case this is GoDaddy. Mailprotector has a tutorial on doing this here. The update process was supposed to be relatively easy. Just log into GoDaddy and delete the existing MX record, and add in the 4 new MX records that Mailprotector provided. In my case the 4 records are:

image

Here’s the configuration within GoDaddy:

image

Looks easy enough, right? Well this is where the second bump in the road occurred. Upon saving, the new MX records seemed to be there for a few minutes, and then would go away, and return back to the original MX record. After a few attempts with the same result, I decided to start searching for an answer. It wasn’t very long before I ran across this post which led me to this post. I vaguely remember when originally configuring SBS2011, something about having all the DNS records automatically configured by the server, and that GoDaddy was one of the domain registrars that it worked with.

In any case, the fix involves adding a new registry DWORD (32-bit) Value, “SkipMXConfig”, with a value of 1 located at: HKEY_LOCAL_MACHINE\Software\Microsoft\SmallBusinessServer\Networking\Services

image

Once I put this in place, I rebooted the server to make sure the new setting took effect. This solved the issue, and Mailprotector started filtering email.

Mailprotector also recommends locking down the network and configuring exchange to only accept email from the Mailprotector server. The instructions are found here. I am deferring this task for the moment and will update this post as I get time to do so.

… A couple days later. I’m still getting a ton of spam, so I’m now continuing on with configuring the Exchange server to only accept email from Mailprotector. The tutorial can be found here. The examples don’t show Exchange 2010, however, it’s pretty much the same as Exchange 2007. Here’s a screen shot of my configuration changes:

image

That’s pretty much it for the initial configuration! I will continue to update this post as I gain more knowledge and experience with Mailprotector’s CloudFilter product.

Filed Under: Notable Tagged With: Exchange 2010, SBS2011, Spam

PHP Random Key Generator

January 10, 2012 By Larry Brouwer Leave a Comment

Yesterday, I needed a way to generate a random alpha-numeric key of various lengths using PHP for a project that I’m currently working on. I didn’t find any built-in functions, so after some Googling, I decided to implement my own version.

[code type=PHP]

private function generateRandomKey($len)

{

$chars = array(‘1′,’2′,’3′,’4′,’5′,’6′,’7′,’8′,’9′,’0’,

‘a’,’b’,’c’,’d’,’e’,’f’,’g’,’h’,’i’,’j’,’k’,’l’,’m”

‘n’,’o’,’p’,’q’,’r’,’s’,’t’,’u’,’v’,’w’,’x’,’y’,’z’,

‘A’,’B’,’C’,’D’,’E’,’F’,’G’,’H’,’I’,’J’,’K’,’L’,’M”

‘N’,’O’,’P’,’Q’,’R’,’S’,’T’,’U’,’V’,’W’,’X’,’Y’,’Z’);

$min = 0;

$max – sizeof($chars)-1;

$key = “”;

for ($i=0; $i<$len; $i++) {

$key .= $chars[mt_ramd($min, $max)];

}

return $key;

}

[/code]


Let me know if anyone has a better suggestion?

Filed Under: Daily Log Tagged With: PHP

How to create a custom self-signed SSL certificate in IIS7

February 22, 2011 By Larry Brouwer Leave a Comment

While installing some demo software today, I had to create a self-signed SSL certificate for IIS7. This is a relatively easy thing to do within the IIS7 Manager. However, the certificate that IIS7 generates is only for the machine that it is running on. I need a certificate that has my custom web site domain name on it. As it turns out, Microsoft has eliminated this capability within IIS7, so the easiest way to accomplish this is to use the selfssl tool from IIS6.

It took me a while to figure out, but after some Googling (with much trial and error), here’s what I came up with.

I found a post, Self-Signed Certificates on IIS7, that I used to create and install the certificate.

[Read more…]

Filed Under: Notable Tagged With: IIS7, SSL

Installing nopCommerce on Windows Server 2008

January 16, 2011 By Larry Brouwer Leave a Comment

So far, I’ve installed three (3) open source shopping carts; PrestaShop, OpenCart, and TomatoCart. All of these packages have been developed with PHP and MySQL technologies. This morning I’ve decided to see if there are any open source ecommerce packages written in a Microsoft .NET environment.

My first search lead me to the Microsoft Web Gallery. From there, I found nopCommerce. It looks like a reasonable package, so I’ve decided to install it and see what it looks like.

I wanted to first look at the documentation, however, it’s not free! I decided to download the product and install it anyway. I have two (2) choices for installing. The first way is to use the Microsoft Web Platform Installer. The second way is to manually download and install it. I’m choosing the latter, as I want to be sure to get the complete package with source code.

[Read more…]

Filed Under: Notable Tagged With: ASP.Net, eCommerce, SqlServer

Installing TomatoCart on Windows Server 2008

January 15, 2011 By Larry Brouwer Leave a Comment

I’m continuing my evaluation of open source ecommerce packages by installing TomatoCart. TomatoCart was chosen as the second runner-up of the 2010 Open Source Awards as published by Packt Publishing.

I began my TomatoCart installation by reviewing the tomato Cart documentation WiKi. The wiki has many uncompleted links, but I managed to find the TomatoCart User Guide, which covered the basics needed to get the software installed.

I downloaded the current version, TomatoCart v1.1.3, and saved it to my “install\tomatocart” folder. I then created a new “tomatocart” folder under my “www” root folder and copied the contents of the “gtrunk2” folder from the downloaded file there.

[Read more…]

Filed Under: Notable Tagged With: eCommerce, MySQL, PHP, TomatoCart

  • 1
  • 2
  • 3
  • …
  • 6
  • Next Page »

Recent Posts

  • Weaver’s Bamboo “Bambusa textilis” clumping bamboo for sale
  • configuring NTP Service on FreeNas, XenServer, and virtualized Windows Server 2012 R2 Domain Controller
  • CentOS 7 Warning: Your Magento folder does not have sufficient write permissions.
  • AOE Scheduler 1.3.0 cron issue with Magento 1.9.2.2

Tag cloud

Port 25 C# Scanpst.exe OfficeLive DotNetNuke MySQL Magento Windows Remote Desktop Outlook 2007 redirect SMTP PrestaShop Blogs IIS7 iframe D-Link Security Comcast eCommerce Exchange 2010 Log Parser clumping bamboo Visual Studio .NET Framework SSMS WordPress Windows 7 PHP Google Analytics Linux Neptune SSL Outlook Connector ASP.Net Live Writer SVN SqlServer mstsc.exe Spam Tools web.config Silverlight SBS2011 Database Mail 301